
How I Built BuildWithOsim: From Idea to Launch

Introduction
If you're reading this, you're witnessing the second chapter of BuildWithOsim. In my first post, I told you why I started this blog. Today, I'm showing you how I built it — from conception to the site you're reading right now. This is the real story: the late nights, the frustrations, the "Aha!" moments, and the decisions I made while juggling a full-time job.
Let's dive in.
The Origin Story
I was scrolling through Twitter, looking at everyone's 2026 goals. AI this, startup that, passive income everywhere. And I asked myself the question that changed everything:
"When will it be MY turn?"
I'd been consuming content for years. Watching tutorials. Reading blog posts. Bookmarking articles I'd "read later". But I'd never created anything.
That night, I made a decision: 2026 would be different.
"The best time to start was 5 years ago. The second best time is right now."
But I had a problem. Actually, several problems:
The Challenges I Faced
- •Time - I work 8-5, Monday to Friday
- •Resources - Limited budget for courses/tools
- •Experience - No previous blog, no audience
- •Location - I'm in Nigeria with internet/power challenges
- •Doubt - "Who would read MY blog?"
Sound familiar?
Instead of letting these stop me, I used them as constraints to drive creativity.
The Birth of an Idea
I knew I wanted to:
- •Document my learning journey
- •Build in public
- •Help others starting from zero
- •Master AI-powered development
- •Eventually make money online
But I didn't want to use Medium or Dev.to. Here's why:
I wanted to OWN my platform.
No algorithm deciding who sees my content. No one taking a cut of my earnings. Complete control and proof that I could build things that work.
Choosing the Tech Stack
I made some research on the stack I was already familiar with (Reactjs), and found out Next js will be best because of it built in SEO capabilities.

My Final Tech Stack
Frontend:
- •Next.js 16 (App Router)
- •React
- •Tailwind CSS
Backend:
- •Supabase (PostgreSQL database)
- •Next.js API Routes
Deployment:
- •Vercel
The Build Process
Step 1: Foundation & Database
Project Setup
bashnpx create-next-app@latest buildwithosim
cd buildwithosim
npm install @supabase/supabase-js
npx create-next-app for the first time
Database Design
I chose Supabase (Postgres) because:
- •SQL is powerful and I wanted to learn it
- •Free tier includes authentication (for later)
- •Great documentation
- •Real-time features built-in
Here's my initial database schema:
sql-- Posts table
CREATE TABLE posts (
  id UUID PRIMARY KEY,
  title TEXT NOT NULL,
  subtitle TEXT,
  slug TEXT UNIQUE NOT NULL,
  content TEXT NOT NULL,
  published_date DATE,
  created_at TIMESTAMP
);

-- Categories table
CREATE TABLE categories (
  id UUID PRIMARY KEY,
  name TEXT NOT NULL,
  slug TEXT UNIQUE
);
Simple. Clean. Gets the job done.

Building Core Features
I built:
- •Blog list page
- •Individual post page
- •Admin panel for creating posts
- •Category system
Step 2: Polish & Launch
Making It Pretty
I'm not a great designer, so I:
- •Found inspiration from blogs I loved (Hostinger, CSS-Tricks)
- •Used Tailwind components
- •Kept it simple and clean

Content & Testing
- •Wrote my first post ("Why BuildWithOsim?")
- •Tested on mobile
- •Fixed bugs
- •Asked friends to review
Deploy Day
bashnpm run build
# No errors! 🎉
git push origin main
# Vercel auto-deployed
Sunday: LAUNCH! 🚀
Shared on:****
- •WhatsApp status

The Technical Details (For Developers)
If you're building something similar, here's what you need to know:
1. Next.js App Router Structure
2. Fetching Posts from Supabase
javascriptimport { supabase } from '@/lib/supabase';

async function getPosts() {
  const { data, error } = await supabase
    .from('posts')
    .select('*')
    .eq('published', true)
    .order('published_date', { ascending: false });

  return data;
}
3. Markdown Rendering
I use react-markdown for rendering blog content:
bashnpm install react-markdown
javascriptimport ReactMarkdown from 'react-markdown';

<ReactMarkdown>{post.content}</ReactMarkdown>
4. Admin Panel (Simple Version)
I built a basic admin panel where I can:
- •Write posts in Markdown
- •Add metadata (title, slug, date)
- •Publish/unpublish
- •Add categories
No authentication yet (I'm the only user for now).
5. Deployment to Vercel
bash# Connect to GitHub
# Push to main branch
# Vercel auto-deploys

# That's it!
What I Learned Building This
Technical Lessons
- •Next.js 16 is amazing - Server components make everything faster
- •Supabase is beginner-friendly - Way easier than setting up my own database
- •Tailwind speeds up development - No more wrestling with CSS
- •TypeScript would've helped - I'm adding it next iteration
Non-Technical Lessons
- •Done is better than perfect - I could've spent months "planning"
- •Constraints breed creativity - Limited time forced me to focus
- •Shipping beats planning - My blog isn't perfect, but it exists
- •Small wins matter - Each feature working was a celebration
The Challenges I'm Still Solving
Let's be honest. It's not perfect:
Current Issues:
❌ Basic design - Works but could be prettier
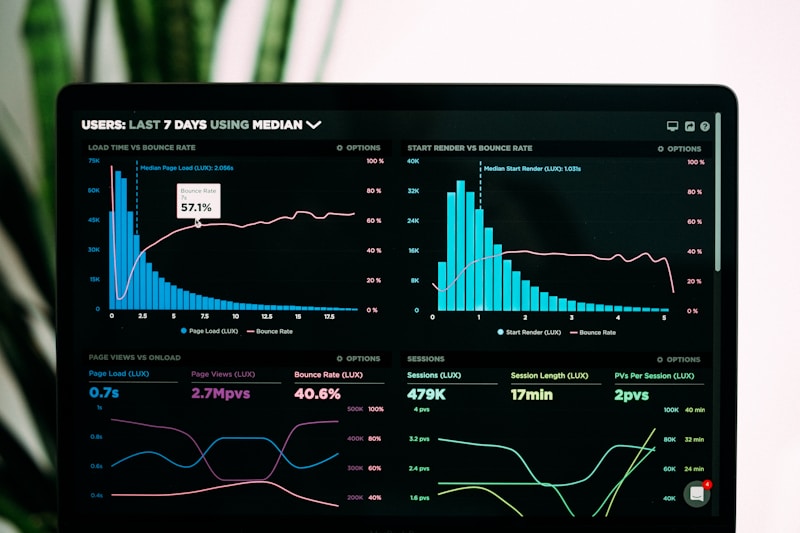
❌ No analytics - Don't know who's reading
❌ Mobile could be better - Responsive but not optimized
What Made This Possible
I want to be honest about what helped me actually finish this: I used Claude AI and ChatGPT to: Debug errors,Generate boilerplate code, Explain concepts I didn't understand and Review my code. I'm not a productivity guru, but I utilise my nights and free period at work and off days to code and build. Focus was and is the key.

My code isn't perfect. My design isn't perfect. My writing isn't perfect. But my blog exists.
"Done is better than perfect. Shipped is better than polished." — Me, 2026
That's what matters.
The Unexpected Benefits
Building this taught me more than just coding:
- •Confidence - I can actually build things
- •Clarity - I understand Next.js way better now
- •Community - People reached out to help
- •Momentum - One project leads to the next
- •Proof - I have something to show for my time
No wrong choice. I chose to build because the building is the point and the channel of learning
Critical Resources
- •Next.js Docs - Official documentation
- •Supabase Docs - Database tutorials
- •Tailwind CSS - Styling guide
- •My GitHub (coming soon) - Full source code
The Most Important Lesson
Here's what I wish someone told me when I started:
You don't need to know everything to start.
I didn't know:
- •Advanced React patterns
- •Database optimization
- •DevOps best practices
- •SEO techniques
- •Content marketing
I learnt them by building.
You will too.
💡Look Here
The best developers I know didn't wait until they knew everything. They started building with what they knew, and learned the rest along the way. That's how you actually grow.
Sarah Chen
Senior Software Engineer at Vercel
Conclusion
The blog you're reading right now is proof. The Next.js code running behind the scenes is proof. The Supabase database storing these words is proof.
If I can do it, you absolutely can too.
Building BuildWithOsim taught me something crucial: The hardest part is starting.
Once you start, momentum carries you. Problems become puzzles. Obstacles become learning opportunities. "Impossible" becomes "I'm possible."
So What's the project you've been thinking about? The idea you keep pushing to "someday"? The thing you'd build if you just had the time/skills/courage?
Start this week.
Not next month. Not when you're "ready." This week.
Because here's the secret: **You'll never feel ready.
📢 Up Next
Next week, I'm diving into something completely different: my React Native journey.
I was engaged with a team to build CV/Resume Builder app using React Native. My first experience with mobile apps ever. It was messy, frustrating, and absolutely worth it.
Title preview: "What I Learned Building a React Native App (And Why I Almost Quit)"
💬 Let's Connect
Drop a comment below and until next time. Keep building. Keep learning. Keep growing.
Related Posts

Comments (0)
Join the conversation
No comments yet. Be the first to share your thoughts!